samedi 20 avril 2024

Ravioli ricotta-ail des ours / Wild Garlic & Ricotta Raviolis


Alors que la saison de l'ail des ours est à son pic, j'avais envie enfin de tester ce fameux mais éphémère condiment, que l'on retrouve dans nos forêts et sur nos marchés seulement quelques semaines par mois, en avril notamment. Je suis allé directement en cueillir de mon côté, on en retrouve dans les sous-bois humides en abondance, pour ceux qui savent où chercher, mais vous pouvez bien sûr vous en procurer sur les marchés en ce moment. Le goût subtil entre ail et oignon nouveau  apporte une intense saveur à cette farce à base de ricotta et de parmesan. C'est la première fois que je réalise des raviolis avec mon nouveau laminoir. Il est important d'étaler la pâte le plus fin possible car elle tend à gonfler pas mal à la cuisson et on veut bien sûr des raviolis légères et délicates et pas une semelle. Pour 4 personnes. 

Ingrédients

- 300 g de farine + pour le pétrissage
- 3 œufs
- 40 g de beurre
- 2 cuil à soupe d'huile d'olive 
- Parmesan, pour servir
- Sel, poivre.

Farce

- 350 g de ricotta
- 2 poignées d'ail des ours
- 1 œuf
- 2 cuil à soupe de parmesan
- 1 cuil à soupe de farine
- 1 cuil à café d'huile d'olive
- Sel, poivre.

1 - Former un puits avec la farine et mettre les œufs au centre avec une pincée de sel. Avec une fourchette mélanger les œufs à la farine mais à la main jusqu'à obtenir une pâte lisse et homogène. Filmer avec du cellophane et mettre au frais 1 h environ. 

2 - Farce: Hacher grossièrement l'ail des ours. Dans une poêle faire chauffer à feu moyen l'huile d'olive et faire revenir l'ail des ours 1 min en remuant. Laisser ensuite refroidir. Mélanger l'ail des ours avec le reste des ingrédients de la farce. 

3 - Couper la pâte en 4 pâtons et les passer au laminoir en plusieurs fois en changeant d'épaisseur à chaque fois pour obtenir une pâte la plus fine possible. Bien fariner les bandes de pâte pour qu'elles ne collent pas. Répartir la farce sur les bandes de pâte - environ 1 cuil à café tous les 5 cm - puis replier la bande de pâte. Humidifier la pâte avec un pinceau légèrement humide et pincer la pâte pour coller le tout. Couper chaque ravioli et les déposer sur une plaque fariner. Laisser reposer 15-20 min.

4 - Faire fondre le beurre avec l'huile d'olive à feu vif jusqu'à obtenir un beurre noisette. Ajouter une pincée de sel et de poivre et réserver. Porter une casserole d'eau salée à frémissement et faire cuire les raviolis jusqu'à ce qu'ils soient tendres. Les enrober directement de beurre noisette, mélanger, ajouter le parmesan et servir immédiatement. 
___________

While the wild garlic season is at its peak, I finally wanted to test this famous but ephemeral condiment, which we find in our forests and on our markets only a few weeks a month, in April mainly. I went straight to pick some on my own as they are found abundantly in the humid undergrowth, for those who know where to look, but you can of course get them on the markets at the moment. The subtle taste between garlic and green onion brings an intense flavor to this filling made from ricotta and parmesan. This is the first time I've made ravioli with my new pasta machine. It is important to roll out the dough as thin as possible because it usually swells a bit when cooked and we of course want light and delicate ravioli and not a piece of leather. For 4 people.

Ingredients

- 300 g flour (11 oz) + for kneading
- 3 eggs
- 40 g butter
- 2 tablespoons olive oil
- Parmesan, to serve
- Salt, pepper.

Filling

- 350 g ricotta (12 oz)
- 2 handfuls of wild garlic
- 1 egg
- 2 tablespoons parmesan
- 1 tablespoon flour
- 1 teaspoon olive oil
- Salt, pepper.

1 - Form a pit with the flour and place the eggs in the center with a pinch of salt. Using a fork, mix the eggs with the flour and then by hand until you get a smooth dough. Wrap in cling film and place in a fridge for about 1 hour.

2 - Filling: Coarsely chop the wild garlic. In a frying pan, heat the olive oil over medium heat and cook the wild garlic for 1 minute, while stirring. Then leave to cool. Mix the wild garlic with the rest of the filling ingredients.

3 - Cut the dough into 4 pieces and pass them through the pasta machine several times, changing thickness each time to get the thinnest possible dough. Flour the strips of dough so that they do not stick. Distribute the filling over the strips of dough - about 1 teaspoon every 5 cm/2" - then fold the strip of dough. Moisten the dough with a slightly damp brush and pinch it to stick everything together. Cut each ravioli and place them on a floured baking sheet. Leave to rest for 15-20 min.

4 - Melt the butter with the olive oil over high heat until you get brown butter. Add a pinch of salt and pepper and set aside. Bring a pan of salted water to a simmer and cook the ravioli until tender. Coat them directly with browned butter, mix, add the parmesan and serve immediately.


Photo - Ail des ours / Wild Garlic, Lyon

dimanche 7 avril 2024

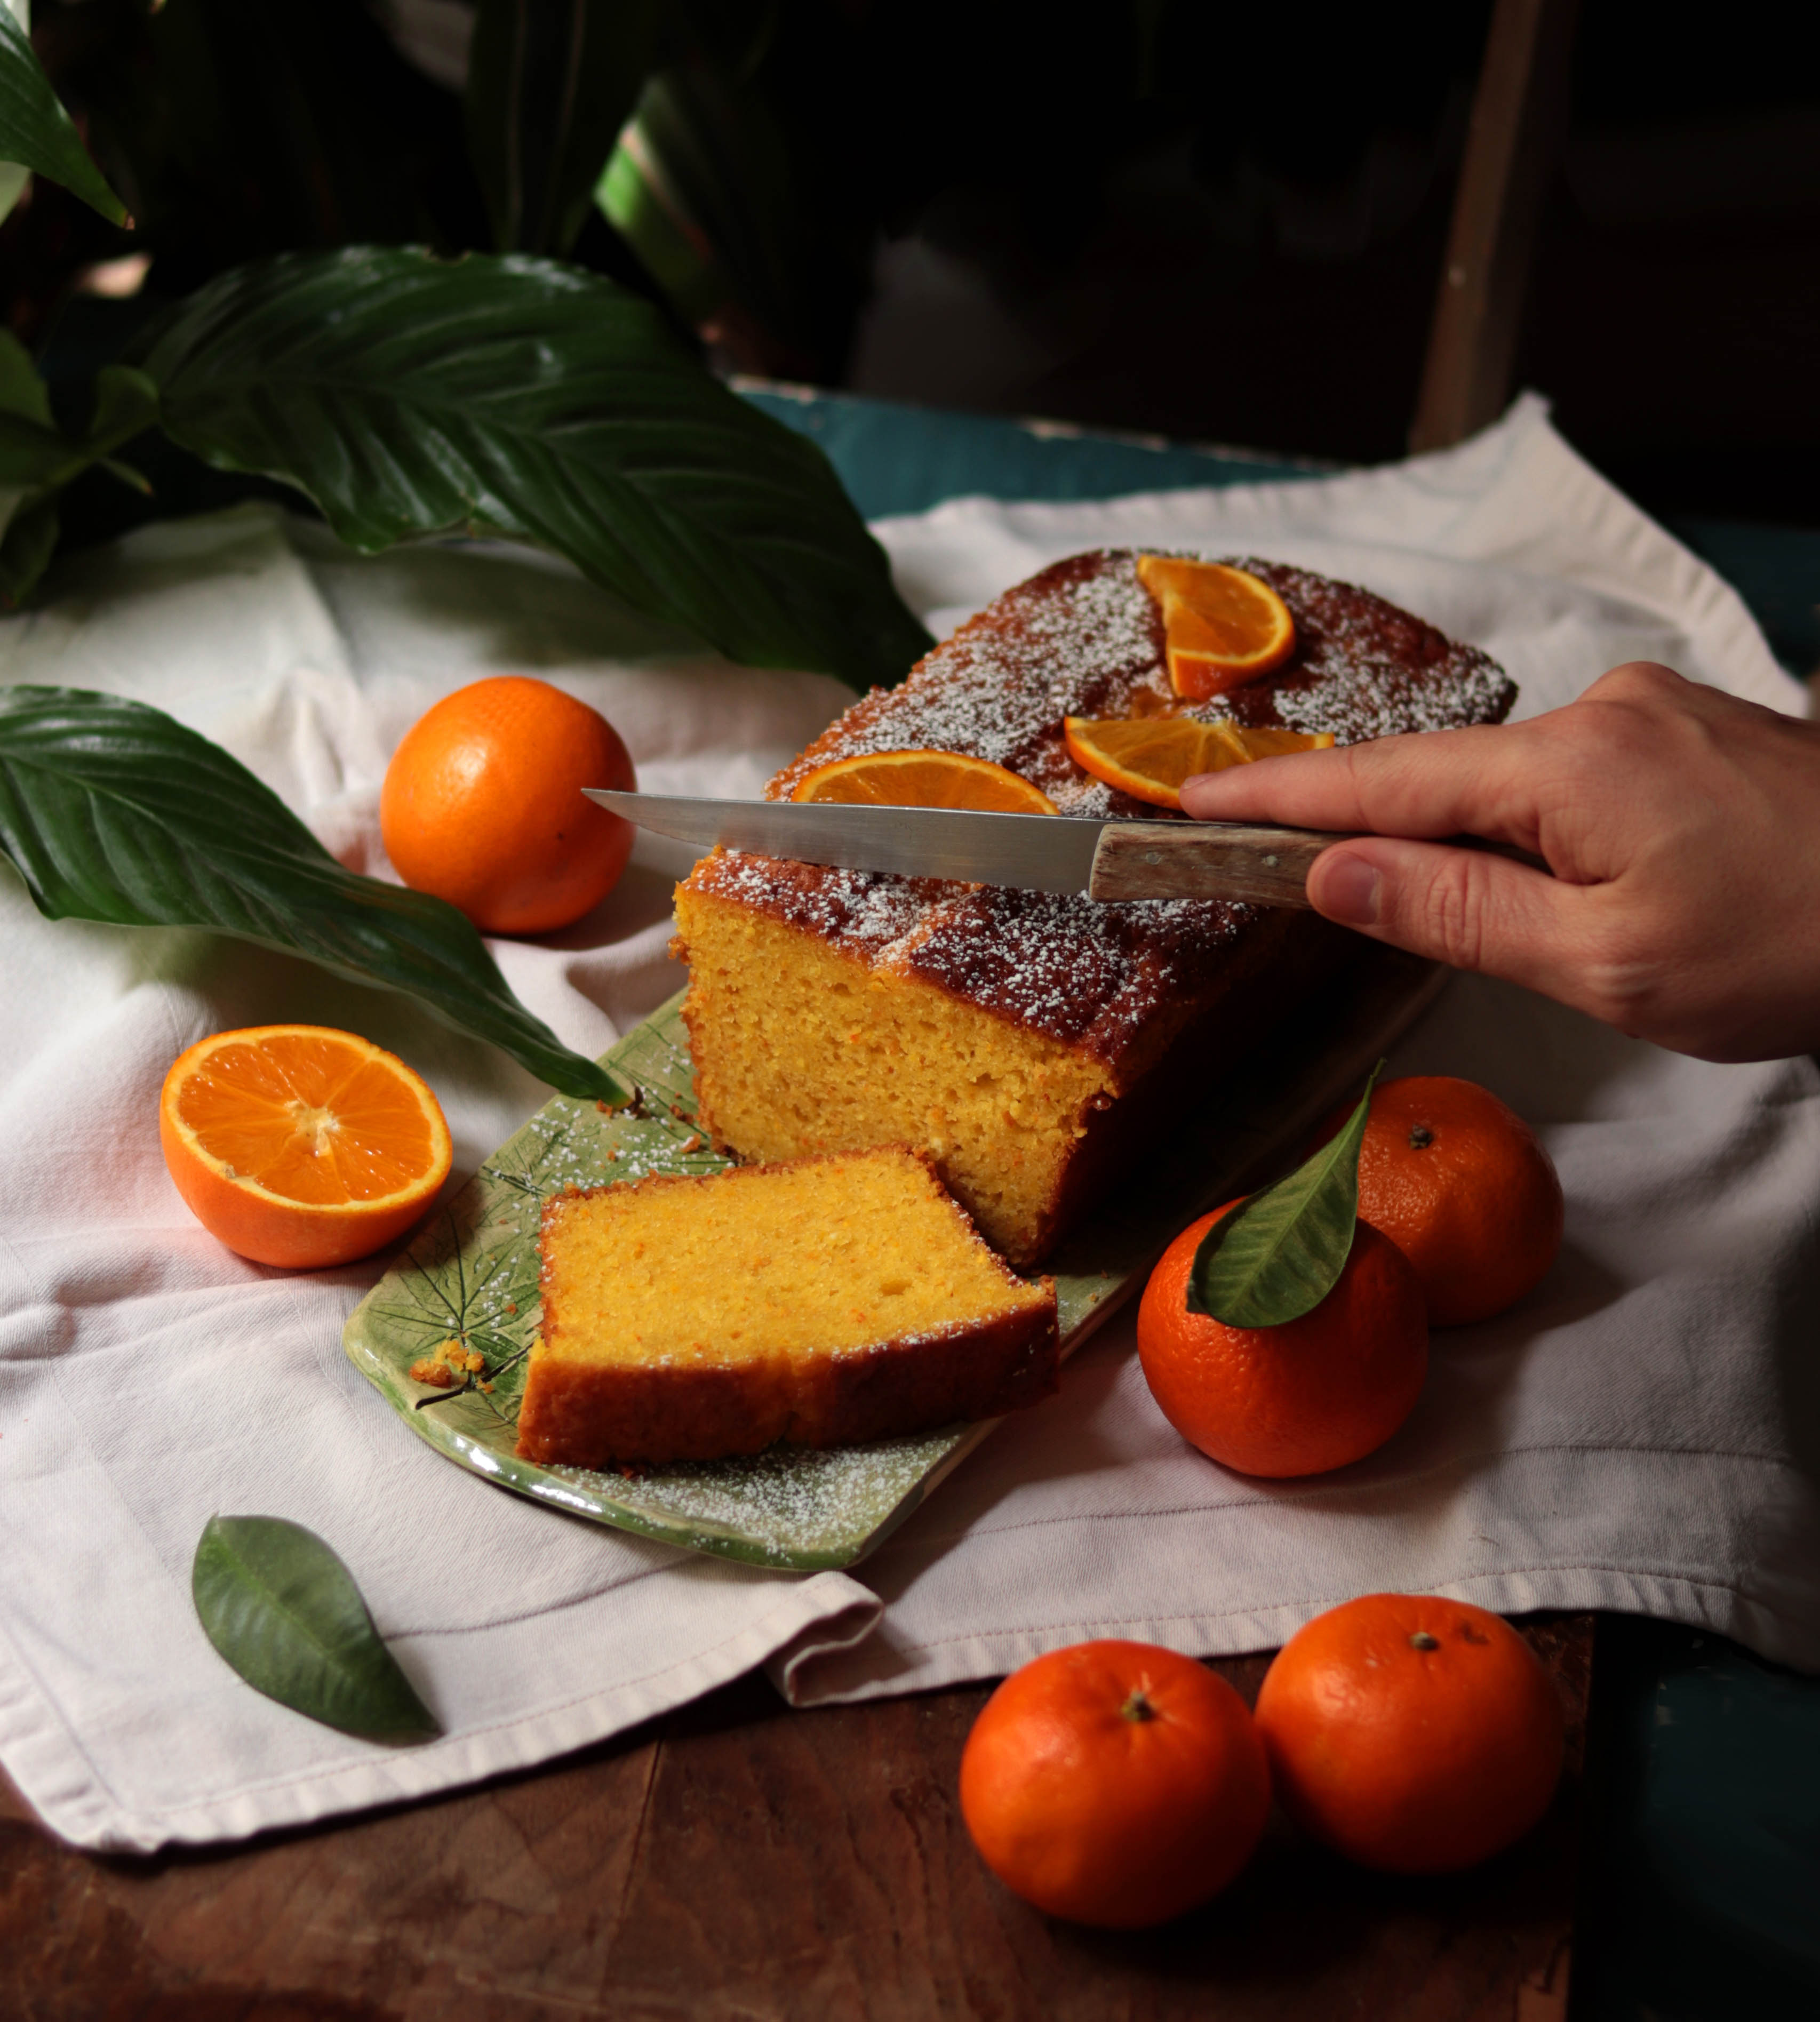
Gâteau minute à l'orange / One-Minute Orange Cake


Je vous propose aujourd'hui une recette simplissime de cake à l'orange que j'ai découvert sur Instagram et que j'ai déjà fait une dizaine de fois. Je n'ai pas copié la recette en détails, mais j'ai surtout repris l'idée de mixer une orange entière, peau et pulpe ensemble, donnant un gâteau très parfumé et bien moelleux. La pâte étant préparée avec un mixeur, elle est prête en quelques instants. Il ne reste plus qu'à enfourner. Pour 10-12 tranches. 

Ingrédients

- 220 g de farine
- 200 g de sucre
- 100 g de yaourt grec
- 100 g d'huile d'olive
- 3 œufs
- 1 orange bio
- 1 sachet de levure chimique
- Beurre, pour le moule.

Couper l'orange en tranches pour retirer d'éventuels pépins. Mixer l'orange jusqu'à obtenir une purée grossière. Ajouter le reste des ingrédients et mixer encore pour obtenir une pâte homogène. Verser la pâte dans un moule à cake beurré. Enfourner 35-40 min dans un four préchauffé à 170°C. A la sortie du four couvrir le gâteau avec un linge pour que le gâteau garde tout son moelleux en refroidissant. Servir à température ambiante. 
___________

Today I'm sharing with you a super simple orange cake recipe that I discovered on Instagram and that I've already made about ten times. I did not copy-paste the recipe , but I mainly used the idea of blending a whole orange, skin and pulp together, giving a very fragrant and moist cake. Since the batter is prepared with a food processor, it is ready in just a few seconds. All that's left to do is put it in the oven. Once again i For 10-12 slices.

Ingredients

- 220 g flour (2 cups)
- 200 g sugar (1 cup)
- 100 g of Greek yogurt (1/3 cup)
- 100 g of olive oil (1/2 cup)
- 3 eggs
- 1 orange, organic
- 1 tablespoon baking powder
- Butter, for the tin.

Cut the orange into slices to remove any seeds. Blend the orange in a food processor until you get a coarse puree. Add the rest of the ingredients and blend again to get a smooth batter. Pour the batter into a buttered cake mold. Bake for 35-40 minutes in a preheated oven to 170°C (350°F). Once cooked remove from the oven and cover the cake with a kitchen cloth so that the cake remains soft as it cools. Serve at room temperature.


Photo - Magnolias, Place du Théâtre des Célestins, Lyon. 

vendredi 15 mars 2024

Spaghetti au citron / Simple Lemon Spaghetti

Aujourd'hui je vous propose une recette de spaghetti simplissime, prête en quelques minutes, mettant à l'honneur le citron, ingrédient que l'on pense rarement à intégrer à des plats de pâtes. C'est une recette que je préparais régulièrement en atelier de cuisine. Le mélange entre l'acidité du citron et la richesse de la crème et du parmesan offre un plat surprenant aux saveurs équilibrées. Pour 4 personnes. 

Ingrédients 

- 400 g de spaghetti 
- 1 gros citron
- 20 cl de crème liquide 30% de MG
- 1 gousse d'ail
- 4 brins de persil, ciselés
- 1 cuil à café d'huile d'olive 
- 150 g de parmesan, râpé 
- Sel, poivre. 

Zester et presser le jus du citron. Dans une poêle faire chauffer l'huile d'olive à feu doux et laisser infuser les zestes de citron et la gousse d'ail, fendue en deux environ 1 min. Déglacer avec la crème et ajouter le persil. Saler, poivrer et laisser frémir 5 min. Ajouter le jus de citron, mélanger et retirer du feu. Faire cuire les spaghetti dans un volume d'eau bouillante salée, jusqu'à ce qu'elles soient al-dente. Égoutter et mélanger directement avec la sauce en incorporant le parmesan. Servir sans attendre. 
__________

Today I share with you a very simple spaghetti recipe, ready in just a few minutes, highlighting lemon, an ingredient that we tend to rarely include in pasta dishes. This is a recipe that I regularly prepared during my cooking classes. The mix between the acidity of lemon and the richness of cream and parmesan offers a surprisingly balanced dish with zingy flavors. For 4 servings.

Ingredients

- 400 g spaghetti (14 oz)
- 1 large lemon
- 20 cl double cream (1 cup)
- 1 garlic clove
- 4 sprigs of parsley, chopped
- 1 teaspoon olive oil
- 150 g parmesan, grated (5 oz)
- Salt, ground peppercorn.

Zest and squeeze the lemon juice. In a pan, heat the olive oil over low heat and let the lemon zest and the garlic clove, split in two, infuse for about 1 minute. Deglaze with the cream and add the parsley. Add salt and pepper and let simmer for 5 min. Add the lemon juice, mix and remove from the stove. Cook the spaghetti in a pot of boiling salted water until al-dente. Drain and mix directly with the sauce while incorporating the parmesan. Serve immediately.


Photo - Portokali Beach, Sithonia, Grèce. 

samedi 2 mars 2024

Focaccia mortadelle-pistache-mozzarella


Depuis mon séjour à Naples j'ai développé un goût très sûr pour les pizzas et focaccia de toutes sorties et notamment les variantes avec des saveurs italianisantes que nous retrouvons peu en dehors de restaurants italiens et trattorias en France. Le mélange mortadelle, pistache et mozzarella est très commun en Italie et il fonctionne en effet très bien. Le goût de la pistache reste subtile mais la mortadelle possède également une saveur délicate tout comme la mozzarella, réhaussé d'une pointe de basilic. Cette recette est meilleure préparée au dernier moment mais si vous devez faire cuire la focaccia en avance, inutile de la garnir, vous n'aurez qu'à la faire réchauffer à environ 120°C au four avant de rajouter les ingrédients frais juste avant de servir. Pour 4 personnes. 
 
Ingrédients 

- 250 g de mozzarella
- 200 g de mortadelle
- 80 g de pâte de pistache
- 30 g de pistaches grillées salées
- 1 bouquet de basilic
- Huile d'olive

Pâte 

- 400 g de farine + pour pétrir
- 40 cl d'eau, tiède
- 1 sachet de levure de boulanger déshydratée (5 g)
- 2 cuil à soupe de semoule de blé fine
- 10 cl d'huile d'olive
- 1 cuil à café de sucre
- 1/2 cuil à café de sel.

1 - Pâte: Diluer la levure de boulanger avec l'eau et le sucre et laisser reposer 10 min jusqu'à ce que le mélange mousse. Incorporer la farine, la semoule de blé fine, la moitié de l'huile d'olive et le sel et pétrir jusqu'à obtenir une pâte lisse, homogène et élastique. Couvrir la pâte d'un linge et laisser reposer 2-3 heures dans une pièce chaude ou toute une nuit au frigo.

2 - Lorsque la pâte a bien levé la dégazer en pressant avec le poing puis la pétrir rapidement. Étaler la pâte sous forme d'une grand rectangle selon votre préférence. Couvrir la pâte d'un linge et laisser gonfler encore 30 min dans une pièce chaude. 

3 - Après la seconde levée, badigeonner avec le reste de l'huile et appuyer avec les doigts. Enfourner pour 10-15 min dans un four préchauffé à 220°C. La pâte doit à peine blondir. Dès la sortie du four déposer étaler la pâte de pistache et arroser d'un généreux filet d'huile d'olive. Égoutter la mozzarella et la déchiqueter sur la pizza. Ajouter le mortadelle et décorer avec les feuilles de basilic et les pistaches, concassées. Servir immédiatement.  
____________

Since my last stay in Naples I developed a sharp appetite for traditional pizzas and focaccia,  particularly the authentic recipes or combination of flavours rarely found outside of Italian restaurants and trattorias. The mortadella, pistachio and mozzarella assemblage is very common in Italy and it works very well indeed. The taste of pistachio remains subtle but the mortadella also has a delicate flavor just like mozzarella and is enhanced with a hint of basil. This recipe is best prepared at the last moment but if you have to cook the focaccia in advance, there is no need to garnish it; you only have to reheat it to around 120°C in the oven before adding the fresh ingredients just before cooking. Four servings.
 
Ingredients

- 250 g of mozzarella
- 200 g of mortadella
- 80 g of pistachio paste
- 30 g salted roasted pistachios
- 1 bunch of basil
- Olive oil

Dough

- 400 g flour + for kneading
- 40 cl of water, lukewarm
- 1 sachet of dehydrated baker's yeast (5 g)
- 2 tablespoons of fine wheat semolina
- 10 cl of olive oil
- 1 teaspoon of sugar
- 1/2 teaspoon of salt.

1 - Dough: Dilute the baker's yeast with water and sugar and leave to rest for 10 minutes until the mixture foams. Incorporate the flour, fine wheat semolina, half the olive oil and salt and knead until you obtain a smooth, homogeneous and elastic dough. Cover the dough with a cloth and leave to rest for 2-3 hours in a warm room or overnight in the fridge.

2 - When the dough has risen well, degas it by pressing with your fist then knead it quickly. Spread the dough into a large rectangle according to your preference. Cover the dough with a cloth and leave to rise for another 30 minutes in a warm room.

3 - After the second rise, brush with the rest of the oil and press with your fingers. Bake for 10-15 minutes in an oven preheated to 220°C. The dough should barely brown. Once out of the oven, spread the pistachio paste and drizzle with a generous drizzle of olive oil. Drain the mozzarella and shred it over the pizza. Add the mortadella and decorate with the basil leaves and crushed pistachios. Serve immediately. 


Photo - Bougainvillée / Bougainvillea, Hauts-de-Cagnes, France. 

mardi 13 février 2024

Tartelettes meringuées au pamplemousse / Meringue Grapefruit Tartlets


Pour la Saint-Valentin j'avais envie de mettre le pamplemousse à l'honneur. C'est la première fois que je pense à faire un dessert uniquement avec ce fruit. Personnellement je ne suis pas nécessairement un grand fan de cet agrume que je trouve un peu amer, mais en réalité cette amertume et cette acidité arrondies par la douceur de la meringue et le côté beurré de la pâte sablée offre un dessert très équilibré. Pour le curd de pamplemousse je me suis permis de rajouter une goutte de colorant rose pour accentuer la couleur saumon de la pulpe du fruit.... C'est la Saint-Valentin après tout! Pour 8 tartelettes. 

Ingrédients

- 3 blancs d'œuf (100 g)
- 100 g de sucre

Pâte sablée

- 250 g de farine
- 125 g de beurre
- 125 g de sucre
- 1 œuf
- 1 pincée de sel.

Garniture coco

- 1 jaune d'oeuf
- 3 cuil à soupe de noix de coco râpée
- 3 cuil à soupe de crème liquide 30% de MG
- 1 cuil à soupe de sucre

Curd de pamplemousse

- 2 gros pamplemousses
- 50 g de sucre
- 2 cuil à soupe de farine
- 2 jaunes d'œuf
- Colorant rose. 

1 - Pâte sablée: Mélanger farine, sucre, beurre et sel jusqu'à obtenir un mélange sablé. Ajouter l'oeuf et continuer à pétrir jusqu'à obtenir une boule de pâte bien lisse. Mettre au frais 30 min. Curd de pamplemousse: Zester et couper en deux les pamplemousses. Garder une moitié de pamplemousse pour la chair. Presser le reste pour le jus. Mélanger le jus et le zeste de pamplemousse, la farine, le sucre et les jaunes d'œuf dans une casserole. Faire chauffer à feu moyen jusqu'à obtenir une crème épaisse mais onctueuse. Prélever la chair du demi-pamplemousse restant en retirant bien toute la peau et les membranes. Ajouter la chair au curd de pamplemousse et mettre au frais.

2 - Étaler la pâte finement (environ 3 mm) et découper des cercles et des bandelettes de pâte pour former des fonds de pâte dans des cercles spécial tartelette de 8 cm de diamètre, comme montré dans cette vidéo. Mettre au congélateur 15 min. Garniture coco: Mélanger tous les ingrédients de la garniture et étaler sur les fonds de pâtes. Enfourner 15 min dans un four préchauffé à 180°C. Laisser entièrement refroidir et retirer les cercles des tartelettes. 

3 - Décorer les fonds de tarte avec les 2/3 de curd de pamplemousse. Mettre le reste dans une poche à douille. Mettre au frais. Meringue: Dans un grand bol mettre les blancs d'œuf avec le sucre sur une casserole au bain-marie à feu moyen. Mélanger délicatement au fouet jusqu'à ce que le sucre soit entièrement dissout. Retirer le bol du bain-marie et fouetter au batteur électrique jusqu'à avoir obtenu une meringue lisse et bien ferme en "bec d'oiseau". 

4 - Mettre la meringue dans une poche avec une douille en étoile. Pocher la meringue sur les tartelettes en formant un cercle épais de meringue tout en laissant un puits au milieu d'environ 2 cm de diamètre. Pocher le curd de pamplemousse dans ce puits et mettre les tartelettes au frais au moins 1 h avant de servir.
___________

For Valentine's Day I wanted to put grapefruit in the spotlight. This is the first time I have thought of making a dessert only with this fruit. Personally I am not necessarily a big fan of this citrus fruit which I find a little bitter, but in reality this bitterness and acidity toned down by the sweetness of the meringue and the buttery side of the shortcrust dough offers a very balanced dessert. For the grapefruit curd I added a drop of pink coloring to accentuate the salmon color of the fruit.... It's Valentine's Day after all! Once again for pastry we need precision so I only use a gram measurement. For 8 tartlets.

Ingredients

- 3 egg whites (100 g)
- 100 g sugar

Shortbread dough

- 250 g flour
- 125 g butter
- 125 g sugar
- 1 egg
- 1 pinch salt.

Coconut filling

- 1 egg yolk
- 3 tablespoons grated coconut
- 3 tablespoons double cream
- 1 tablespoon sugar

Grapefruit curd

- 2 large grapefruits
- 50 g sugar
- 2 tablespoons flour
- 2 egg yolks
- Pink coloring.

1 - Shortbread dough: Mix flour, sugar, butter and salt until you get a crumbly mixture. Add the egg and continue to knead until you get a smooth ball of dough. Put in the fridge for 30 min. Grapefruit curd: Grate the zest and cut the grapefruits in half. Keep one half of the grapefruit for the flesh. Squeeze the rest for the juice. Combine the grapefruit juice and zest, flour, sugar and egg yolks in a saucepan. Heat over medium heat until you get a thick but smooth curd. Take the flesh from the remaining half of the grapefruit, removing all the peel and membranes. Add the flesh to the grapefruit curd and put in the fridge.

2 - Roll out the dough thinly (around 3 mm) and cut out circles and strips of dough to form pastry bases in tartlet pastry circles (8 cm in diameter) as shown in this video. Place in the freezer for 15 minutes. Coconut filling: Mix all the filling ingredients and spread over the dough shells. Bake for 15 minutes in an oven preheated to 180°C. Leave to cool completely and remove the circles from the tartlets.

3 - Decorate the shells with 2/3 of the grapefruit curd. Put the rest in a piping bag. Put in the fridge. Meringue: In a large bowl place the egg whites with the sugar on a saucepan in a bain-marie over medium heat. Mix gently with a whisk until the sugar is completely dissolved. Remove the bowl from the bain-marie and whisk with an electric mixer until you have get a smooth and firm “bird’s beak” meringue.

4 - Put the meringue in a piping bag with a star nozzle. Pipe the meringue onto the tartlets, forming a thick circle of meringue while leaving a hole in the middle of about 2 cm in diameter. Poach the grapefruit curd leftover in this hole and refrigerate the tartlets for at least 1 hour before serving. 


Photo - Roses, Parc de la Tête d'Or, Lyon. 

jeudi 8 février 2024

Cocotte de poulet aigre-doux & Sauce au piment fumé / Chicken Hotpot & Smoked Chili Sauce


Après les fêtes de fin d'année j'ai eu beaucoup de travail et j'ai eu très peu de temps pour l'occuper de mon blog. Me revoilà donc ici pour vous proposer une recette à l'occasion du Nouvel An Chinois qui commencera cette année le 10 février et qui célébrera le dragon. Le poulet mijote dans un bouillon délicat à la sauce soja et à la poudre de cinq-épices, le tout étant accompagné d'une riche pâte de piment fumé, que j'ai essayé de copier après avoir en avoir goûté dans un petit restaurant sino-vietnamien de Lyon. J'utilise ma propre huile au piment comme base pour la sauce, mais vous pouvez évidemment en acheter déjà prête dans le commerce ou utiliser une huile végétale neutre pour un résultat moins pimentée. Pour 6 personnes. 

Ingrédients

- 1 kg de cuisses de poulet 
- 200 g de champignons de Paris
- 2 oignons, hachés
- 4 gousses d'ail, émincées
- 4 cuil à soupe de sauce soja
- 2 cuil à soupe de vinaigre de riz
- 1 cuil à soupe d'huile de sésame
- 1 cuil à soupe de sucre
- 1 cuil à soupe de gingembre, émincé
- 1 cuil à café de poivre du Sichuan
- 1/2 cuil à café de cinq-épices
- 1 cuil à soupe d'huile végétale
- Coriandre.

Sauce au piment fumé

- 4 cuil à soupe d'huile au piment
- 2 cuil à soupe de sauce BBQ
- 2 piments rouges, hachés finement 
- 1 gousse d'ail, émincée
- 1 cuil à café de gingembre, émincé.

1 - Dans une cocotte faire chauffer l'huile végétale et faire colorer le poulet sur toutes les faces. Couper les champignons en quatre. Retirer le poulet et réserver. Faire revenir l'oignon, l'ail et le gingembre à feu moyen et laisser caraméliser. Ajouter les champignons, le cinq-épices, le poivre du Sichuan, moulu, et le sucre. Déglacer avec la sauce soja, le vinaigre de riz et l'huile de sésame. Ajouter 20 cl d'eau, couvrir et laisser mijoter à feu doux environ 1h jusqu'à ce que le poulet soit bien tendre. 

2 - Sauce au piment fumé: Dans une petite poêle faire chauffer l'huile au piment à feu doux et faire colorer le piment, l'ail et le gingembre 1-2 min, puis déglacer avec la sauce BBQ et laisser caraméliser à feu doux environ 5 min. Réserver. Retirer la peau et les os du poulet et effilocher la viande grossièrement. Parsemer de coriandre ciselée et servir sans attendre avec du riz et la sauce au piment fumé. 
___________

After the end of the holiday season I had a lot of work and very little time to spend on my blog. So here I am again to share with you a recipe for the Chinese New Year. This year we will celebrate the Dragon from February 10th. The chicken simmers in a delicate broth with soy sauce and five-spice powder, served with a rich smoky chili paste, which I tried to replicate after tasting a delicious chily paste in a small Chinese-Vietnamese restaurant in Lyon. I used my own chili oil as a base for the sauce, but you can obviously buy ready-made ones from the store or use a neutral vegetable oil for a less spicy result. For 6 servings.

Ingredients

- 1 kg chicken thighs (35 oz)
- 200 g button mushrooms (7 oz)
- 2 onions, chopped
- 4 cloves of garlic, minced
- 4 tablespoons of soy sauce
- 2 tablespoons of rice vinegar
- 1 tablespoon of sesame oil
- 1 tablespoon of sugar
- 1 tablespoon ginger, minced
- 1 teaspoon of Sichuan pepper
- 1/2 teaspoon five-spice powder
- 1 tablespoon of vegetable oil
- Cilantro.

Smoked chili sauce

- 4 tablespoons of chili oil
- 2 tablespoons of BBQ sauce
- 2 red peppers, finely chopped
- 1 clove of garlic, minced
- 1 teaspoon of ginger, minced.

1 - In a pot, heat the vegetable oil and brown the chicken on all sides. Cut the mushrooms into quarters. Remove the chicken and set aside. Brown the onion, garlic and ginger over medium heat and allow to caramelize. Add the mushrooms, five-spice powder, freshly ground Sichuan pepper and sugar. Deglaze with soy sauce, rice vinegar and sesame oil. Add 20 cl (1 cup) of water, cover and simmer over low heat for around 1 hour until the chicken is very tender.

2 - Smoked chili sauce: In a small pan, heat the chili oil over low heat and brown the chili pepper, garlic and ginger for 1-2 minutes, then deglaze with the BBQ sauce and let caramelize over low heat. about 5 mins. Set aside. Remove the skin and bones from the chicken and roughly shred the meat with fork. Sprinkle with chopped coriander and serve immediately with rice and the smoked chili sauce.


Photo - Pivoines, Parc de la Tête d'Or, Lyon.

samedi 23 décembre 2023

Bûche mangue-coco-passion / Coconut-Mango-Passion Yule Log


Après avoir réalisé de nombreuses recettes de bûche, en privilégiant des ingrédients comme le chocolat, les pommes, le citron et Cie, j'avais envie cette année de préparer une bûche aux accents tropicaux. Je trouve que la douceur et la richesse de la noix de coco s'associe bien avec la fraîcheur et l'acidité du mélange mangue-passion. Encore une fois je suis parti sur un biscuit roulé que je préfère aux entremets à base de mousse. Pour 10-12 parts. 

Ingrédients

Génoise

- 150 g de sucre 
- 110 g de farine 
- 4 œufs 
- 1 pincée de sel
- Noix de coco, pour décoration.

Mousse coco

- 250 g de mascarpone 
- 40 cl de crème liquide 30% de MG 
- 70 g de noix de coco râpée
- 70 g de sucre 
- 1/4 gousse de vanille.

Crème mangue-passion 

- 1 mangue, bien mûre
- 4 fruits de la passion
- 2 œufs
- 60 g de sucre
- 1 cuil à soupe de farine.

1 - Mousse coco: Dans une casserole faire frémir 20 cl de crème, la noix de coco râpée, le sucre et la gousse de vanille, grattée. Laisser infuser 10 min à feu doux. Retirer du feu et laisser refroidir. Retirer la gousse de vanille. Tamiser le tout en pressant bien pour extraire toute la crème. Mettre la crème au frais et conserver la noix de coco bien égouttée pour préparer la génoise. 

2 - Crème mangue-passion: Éplucher et couper la mangue en petits cubes. Mettre 2/3 des cubes de mangue dans une casserole avec 10 g de sucre et laisser compoter à feu moyen-doux environ 15 min jusqu'à ce que la mangue soit réduite en purée (passer au mixer si nécessaire). Ajouter le reste des cubes de mangue et réserver. Prélever la pulpe des fruits de la passion et tamiser le tout pour retirer les graines. Dans une casserole mettre la jus des fruits de la passion, le reste du sucre, les œufs et la farine. Bien fouetter et faire cuire à feu moyen jusqu'à obtenir une crème lisse et épaisse. Retirer du feu et incorporer la compotée de mangue à la crème passion. Mettre au frais. 

3 - Génoise: Mettre les œufs et le sucre dans un saladier au bain-marie et fouetter 5-10 min jusqu'à obtenir un mélange jaune pâle et mousseux. Ajouter la noix de coco de la mousse coco. Tamiser la farine et le sel. Enlever le saladier du bain-marie et ajouter la farine et le sel en plusieurs fois avec une maryse. Doubler une plaque de cuisson (30x40 cm environ) avec du papier sulfurisé et répartir la pâte. Enfourner dans un four préchauffé à 180°c pour 15 min. Laisser tiédir, puis décoller cette génoise du papier. La déposer sur un linge et la rouler très délicatement. Réserver. 

3 - Mettre la crème mangue-passion et la moitié de la mousse coco en poche à douille. Dérouler la génoise bien froide et pocher la crème mangue-passion et la mousse coco en alternant pour faire des lignes. Rouler fermement pour obtenir une bûche bien cylindrique. Couvrir la bûche avec le reste de la mousse coco en décorant selon vous goûts (cubes de mangue, pulpe de fruits de la passion, etc.). Saupoudrer de noix de coco râpée. Couper les extrémités pour un fini plus net et mettre au frais environ 30 min pour que le glaçage fige un peu, avant de servir. 
___________

After having made many yule logs recipes, favoring ingredients like chocolate, apples, lemon and so on, this year I wanted to prepare a yule log with an exotic flair. I find that the sweetness and richness of the coconut combines well with the freshness and acidity of the mango-passion fruit blend. Once again I opted for a rolled biscuit which I prefer to mousse-based desserts. once again I use a gram/centiliter measurements because the once/cup system is too vague for fine pastry. For 10-12 slices.

Ingredients

Sponge cake

- 150 g of sugar
- 110 g of flour
- 4 eggs
- 1 pinch of salt
- Coconut, for decoration.

Coconut mousse

- 250 g of mascarpone
- 40 cl of liquid cream 30% fat
- 70 g grated coconut
- 70 g of sugar
- 1/4 vanilla pod.

Mango-passion curd

- 1 mango, fully ripe
- 4 passion fruits
- 2 eggs
- 60 g of sugar
- 1 tablespoon of flour.

1 - Coconut mousse: In a saucepan, bring 20 cl of cream, the grated coconut, the sugar and the scraped vanilla pod to a simmer. Leave to infuse for 10 minutes over low heat. Remove from heat and let cool. Remove the vanilla pod. Sift everything together, pressing well to extract all the cream. Refrigerate the cream and keep the well-drained coconut to prepare the sponge cake.

2 - Mango-passion curd: Peel and cut the mango into small cubes. Place 2/3 of the mango cubes in a saucepan with 10 g of sugar and leave to stew over medium-low heat for about 15 minutes until the mango is pureed (blend with a food processor if necessary). Add the rest of the mango cubes and set aside. Take the pulp of the passion fruit and sieve everything to remove the seeds. In a saucepan put the passion fruit juice, the rest of the sugar, the eggs and the flour. Whisk well and cook over medium heat until you obtain a smooth and thick cream. Remove from the heat and add the cubed butter while whisking. Incorporate the mango compote into the passion cream. Put in the fridge.

3 - Sponge cake: Place the eggs and sugar in a bowl in a bain-marie and whisk for 5-10 minutes until you obtain a pale yellow and foamy mixture. Add the coconut from the coconut mousse. Sift the flour and salt. Remove the bowl from the bain-marie and add the flour and salt in several batches with a spatula. Line a baking tray (approximately 30x40 cm) with baking paper and spread the dough. Bake in a preheated oven at 180°C/355°F for 15 minutes. Leave to cool, then peel this sponge cake off the paper. Place it on a cloth and roll it very delicately. To book.

3 - Place the mango-passion curd and half of the coconut mousse in a piping bag. Unroll the cold sponge cake and pipe the mango-passion cream and the coconut mousse alternately to make lines. Roll firmly to obtain a very cylindrical log. Cover the log with the rest of the coconut mousse, decorating according to your taste (mango cubes, passion fruit pulp, etc.). Sprinkle with grated coconut. Cut the ends for a neat finish and refrigerate for about 30 minutes so that the icing sets a little, before serving.


Photos - Strasbourg